The Green Screen Zipper Help
Main Screen
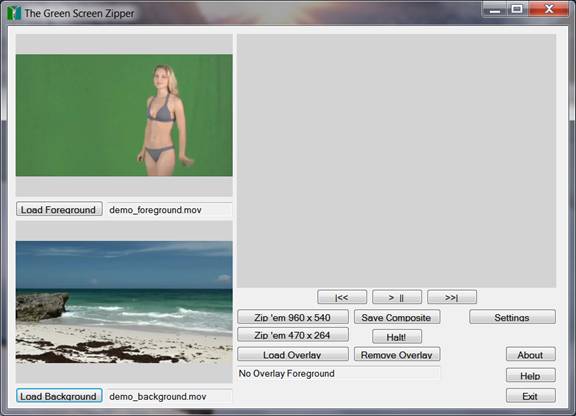
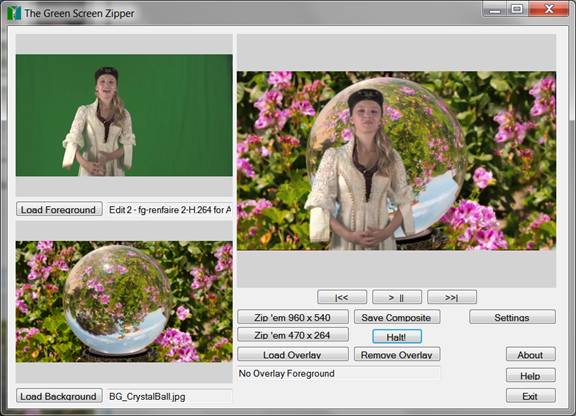
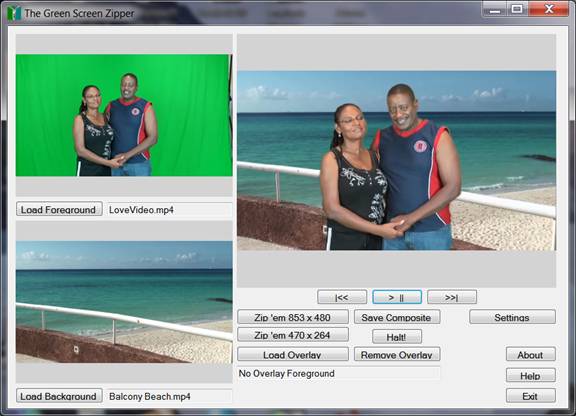
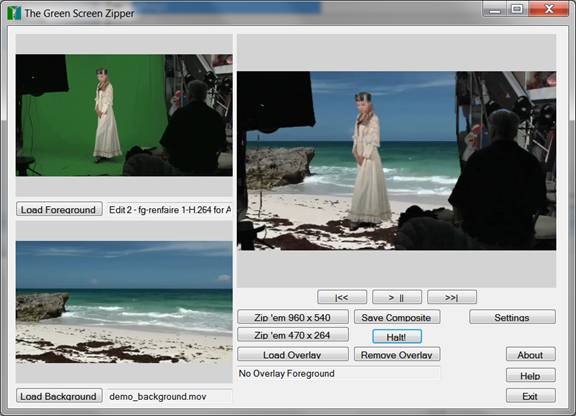
Green Screen Zipper offers a simple, intuitive user interface that makes it easy to learn, easy to use, and fun for all ages and skill levels. The screen opens with a default low resolution video;
Getting Started
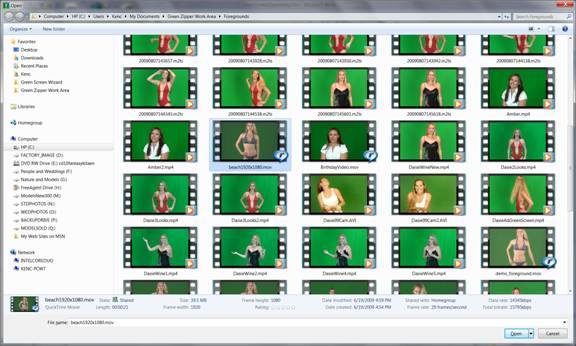
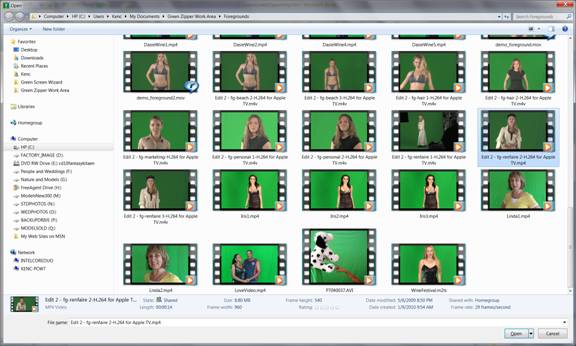
First you load your foreground video by clicking on the load foreground button. An open dialog like the one shown below will appear and allow you to select the foreground video. Green Screen Zipper supports any video file that can be read by quick time. This includes most AVI files, Mpeg files and Mpeg4 files and of course Mov files.
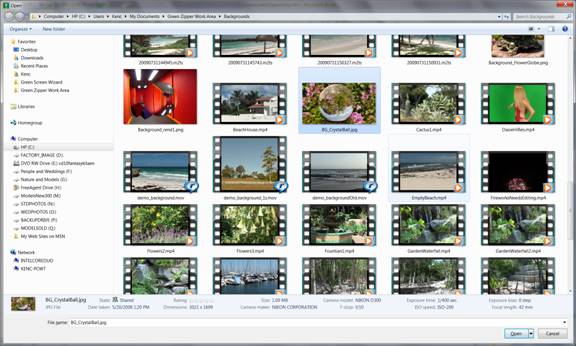
select a background image or video by hitting the load background button.
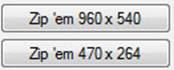
If your videos are well exposed then you can start the zipping process. Green Screen Zipper offers two zipping options. The top zipping button will create an output video that is the same resolution as the foreground video. In our demo video the resolution is 960x540. The lower zipping button will always create a video that is a good size for web display. Most of the time selecting this option will create a lower resolution video then the foreground video, so it will encode faster.
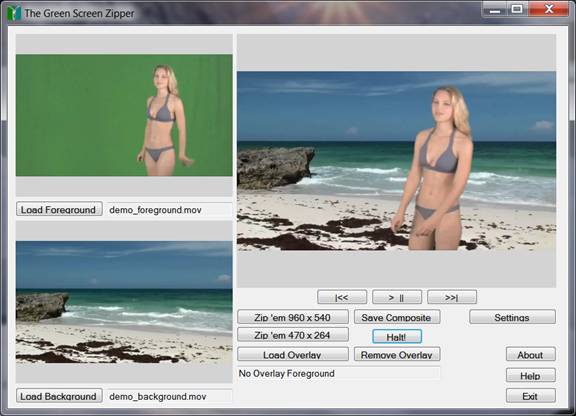
Once the zipping process has stated an indicator will show progress. When the indicator hits 100% the indicator will disappear and the video will start playing. You can watch it as many times as you like but when you are finished you should hit the “Save Composite” button to save the video. You can use the play buttons to replay the video.
Adjusting the Video
If you would like to adjust the Green Screen removal settings or adjust the video brightness, contrast or white balance then start the zipping process and then click the settings button. This will bring up the settings dialog that will be discussed below. Do your adjustments as the video is playing and then when you are happy click the ok button on the settings dialog. The settings dialog will close but the video will continue zipping. Click the halt button on the front panel and then click the zipem button. This will restart the zipping process with your new settings.
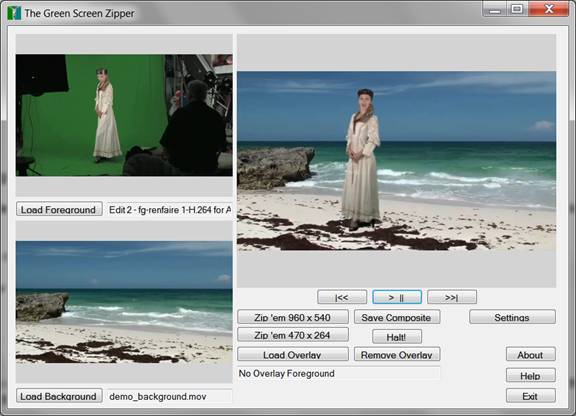
Adding an Overlay
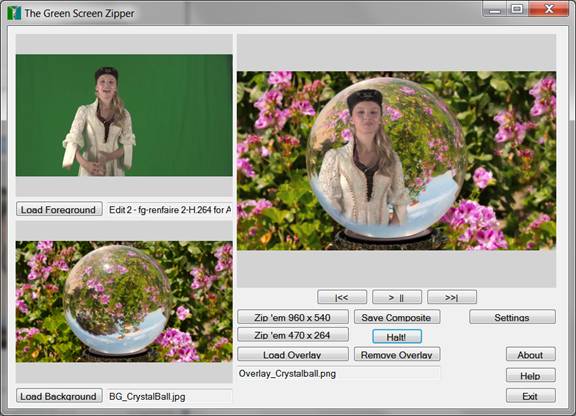
The Overlay button will let you place a still overlay on top of the video. This can make people seem to be inside something like a crystal ball or maybe just a fancy frame.
Lets start by loading the princess. To do that click the load foreground buttons.
Select the Princess. Next hit the load background button and select the background for the globe.
If we zipped the video now we would get the princess on top of the globe.
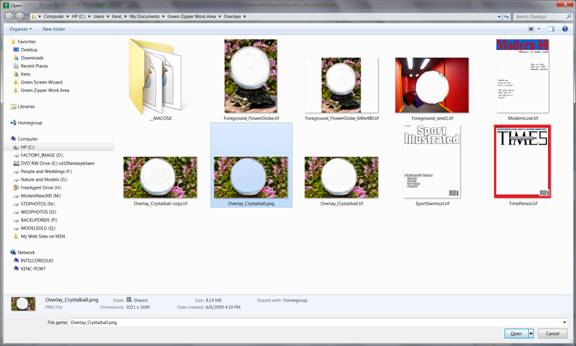
Next we click "Load Overlay" then select the globe overlay. (Note the overlay will not be seen until you start to zip the videos).
Now the princess will appear as if she is in the Globe.
If later you would like to remove the overlay then simply click the “Remove Overlay” button and the overlay will be removed. You can create your own overlays in Photoshop or any program that can create a PNG file with transparent areas.
The Settings Dialog
The Green Screen Zipper uses the same proven powerful green screen removal engine used it the Green Screen Wizard package. A great deal of control is given to the Green Screen removal process. Controls are also supplied to match foreground and background brightness, contrast and white balance.
To use the controls click on the setting button while the video is zipping. Make your adjustments and then close the settings window and hold the video. When you start zipping agin the new video will start with the setting from the last session.
The setting dialog checkbox selections and it has three sections that are accessed by a tab control.
Exposure Dialog
The first tab section deals with exposure and color:
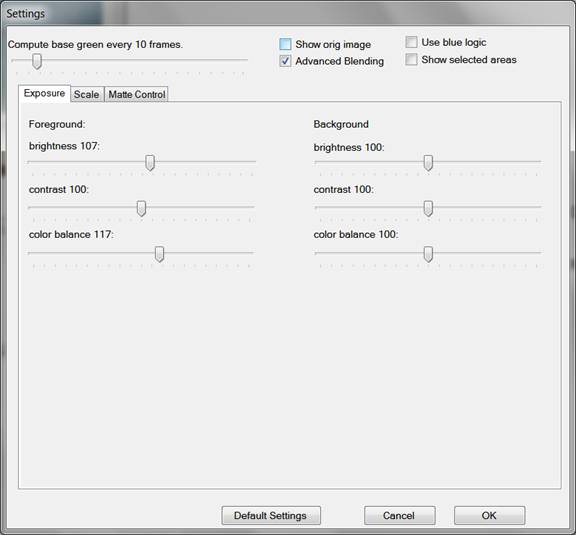
The Checkbox Choices
Show Orig Image: this box will let you see the original video image with no green screen removal
Advanced Blending: advanced blending tries to blend the edges of the image so that it appears as if foreground is part of the background. Checking this box will create a better video but it will also take more time to create the video.
Use Blue Logic: check this box if your video was shot on a blue background.
Show Selected Areas: checking this box will show the selected area as different colored areas.
The Image Adjustment sliders
Brightness: sliding right will make the image brighter, left darker
Contrast: sliding right will increase contrast, left decrease contrast
White Balance: siding right will add red, going left will add blue. This slider will change the base green and thus effect the removal process
The Scale Dialog
The second tab section deals with scaling the foreground and background videos:
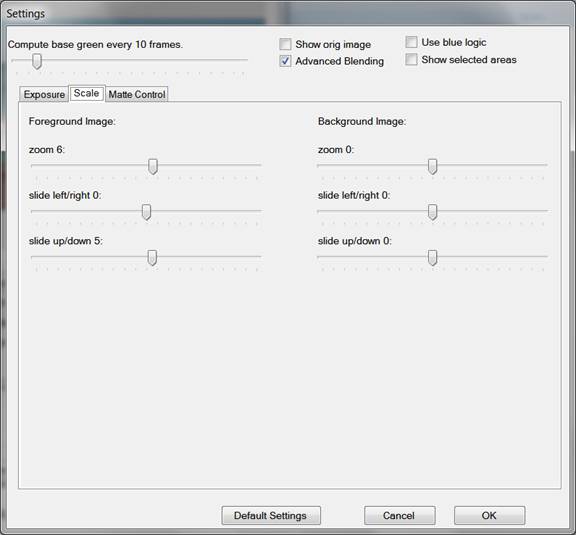
Scale controls allow you to pan and zoom both the foreground and the background. As shown below here is the image zoomed in and zoomed out.
Zoomed in
Zoomed out

The foreground and background can be zoomed in and out it independently. This is particularly useful if you're using an overlay and you want to center the image in the overlay. Controls are also provided to let you pan the image left or right.
The Matt Control Dialog
The last tab section deals with the Matt controls. These controls are used to clip the image into adjust the green screen removal algorithm.
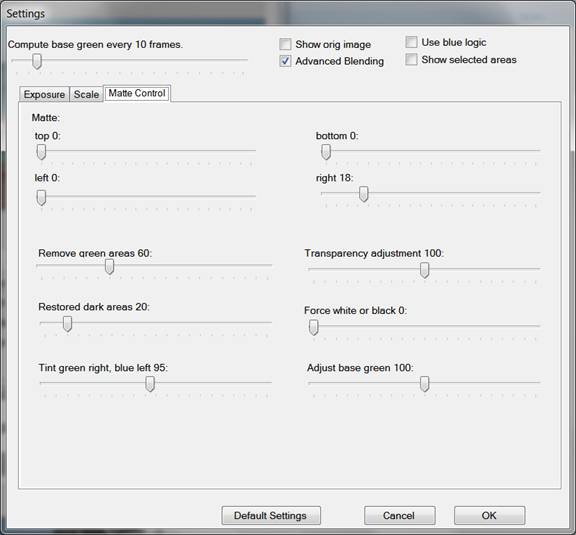
The Matt Controls
The Matt sliders will remove foreground that the green screen process would not.
In this example there is a lot of side foreground that we do not want in our video.
Using then left and right Matt sliders we can remove it.
The Green Removal Sliders
Compute Base Green: this slider determines how often the system re-computes the green color of the background. A low number means that the background will be computed more often making the green screen removal more accurate but slowing down the process.
Remove Green Areas: this slider determines how selective the system should be about totally removing green areas. A high setting will give a cleaner background but may erase parts of the hair or in some cases parts of the foreground.
Restore Dark Areas: the Remove Green Areas slider often removes dark areas on the background. The Restore Dark areas slider is use to get them back. If dark detail in hair is missing slide this slider to the right. If dark areas are on the background then slide the slider to the left.
Tint Green Right, Blue Left: when the system processes areas of the image that have green in them it tries to change the color back to the original color that existed before the green light from the background changed the color. It you slide this slider to the right it will make these green areas more green and less transparent. If you slide this slider right then it makes the area less transparent and redder.
Transparency Adjustment: slide this slider right to make things less transparent right to make them more transparent.
Force White/Black: often there is green spill on white or black areas that is hard to remove. Sliding this slider to the right will make black areas pure black and white areas pure white.
Adjust Base Green: this changes the brightness of the computed green background. It is hard for the system to compute the exact brightness of the background. The sliding this a bit to the left and then to the right can help determine the correct brightness level.